
Questions or comments?
karen @ nwnative dot us
We take long road trips around the US, Canada, and Mexico. We happily traveled in a converted Chevy Express passenger van for 10 years, and when the time came to replace it, we knew exactly what features we wanted in a new van.
"We" are Karen and Grant from Kirkland WA. We designed the van together. Grant did the electrical, metalworking, and Fatmat. Karen did the insulation, woodworking, and accessories. Costs are listed below.
[Update: we've now put 35,000 miles on the van and we still absolutely love it.]
Here is a two-minute video tour. (We've made a few minor changes to the interior since this was filmed, as you can see from the photos below.)
At this point we didn’t need a detailed design, we just wanted to be sure the van we chose would be the best height and length for our layout.
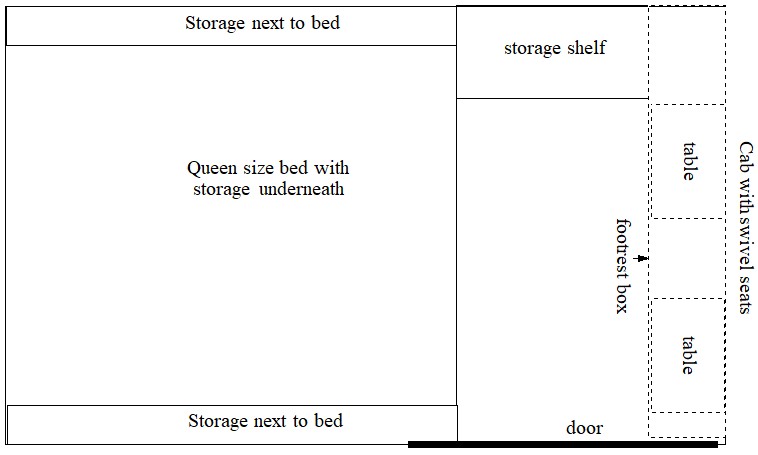
Our basic design
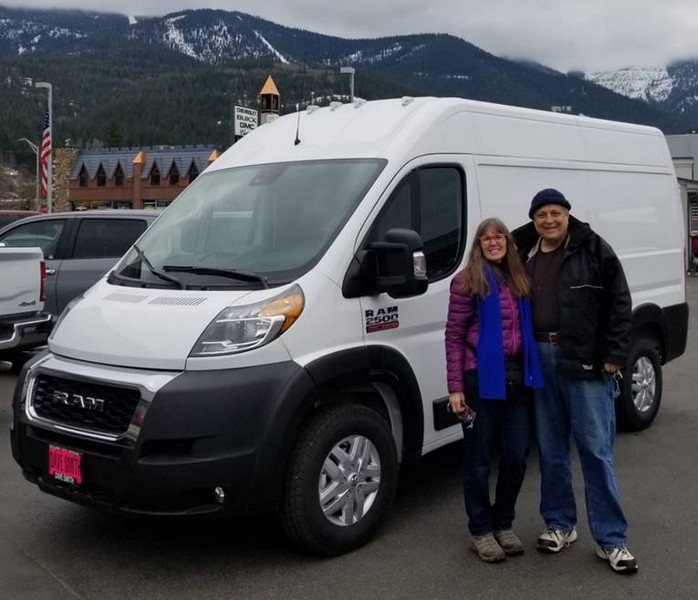
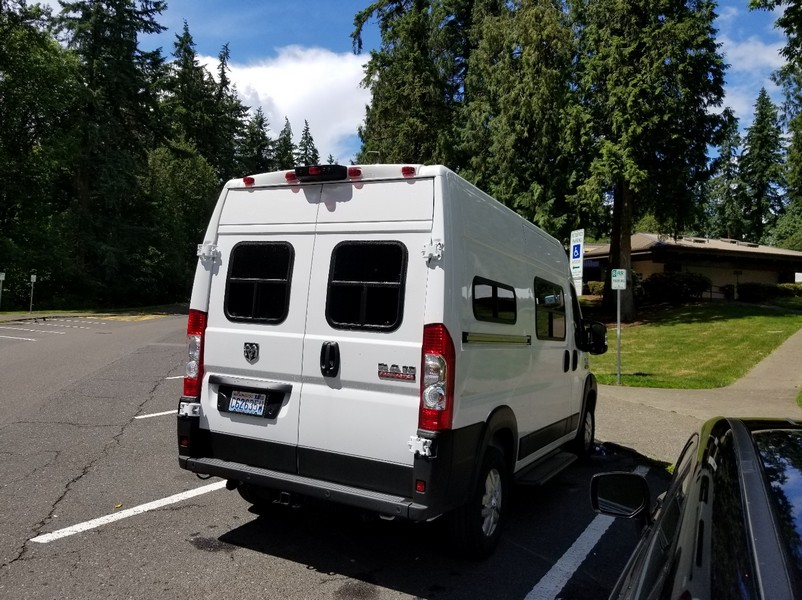
Picking up our new Promaster from the dealer in Idaho (we couldn’t find a used one that met our spec)
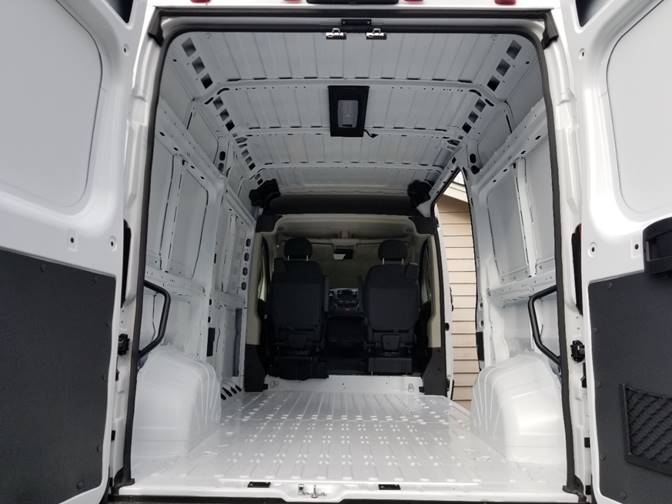
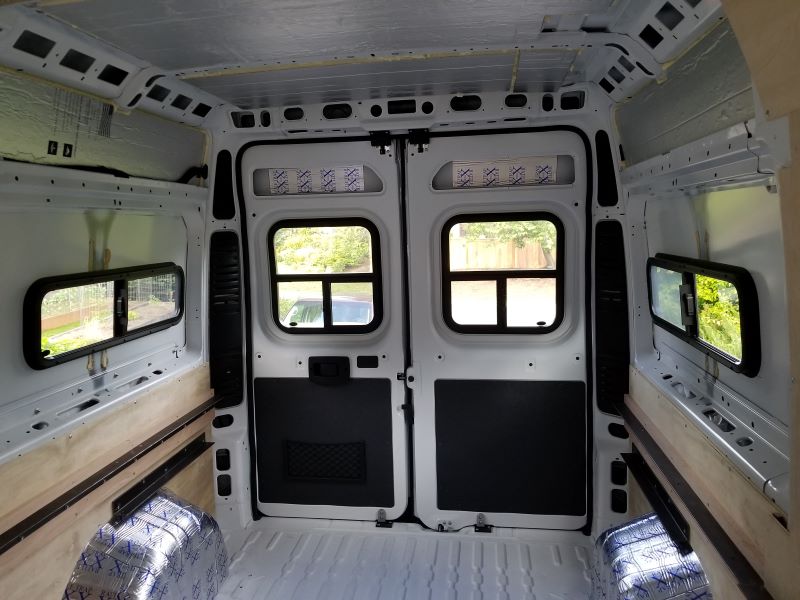
“Before” (we removed the rear handles and ceiling light)
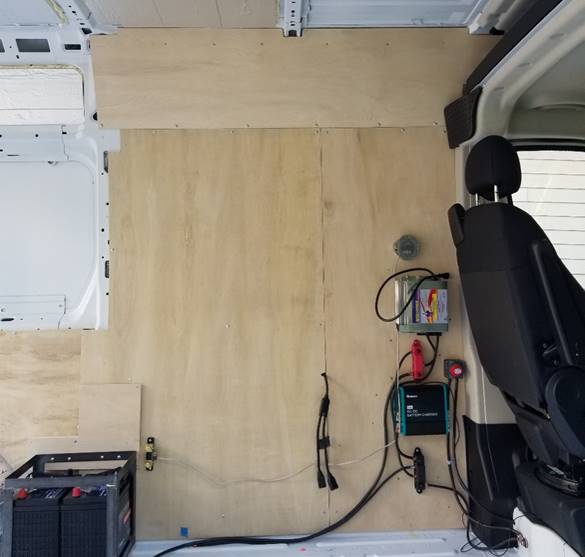
Before we started insulating, we needed to decide where we would install the shore power port. That meant we needed an electrical plan before we did anything else. We decided to put the electrical panel up front for easier access, to increase storage space under the bed, and to reduce weight in the back of the vehicle.

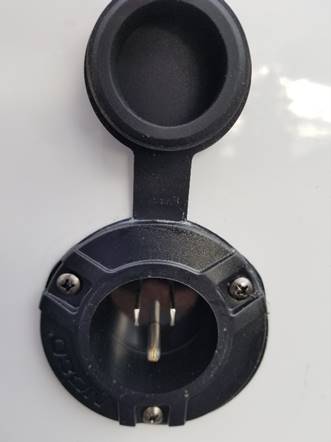
Installing the shore power port using a conduit punch. We used this Noco port.
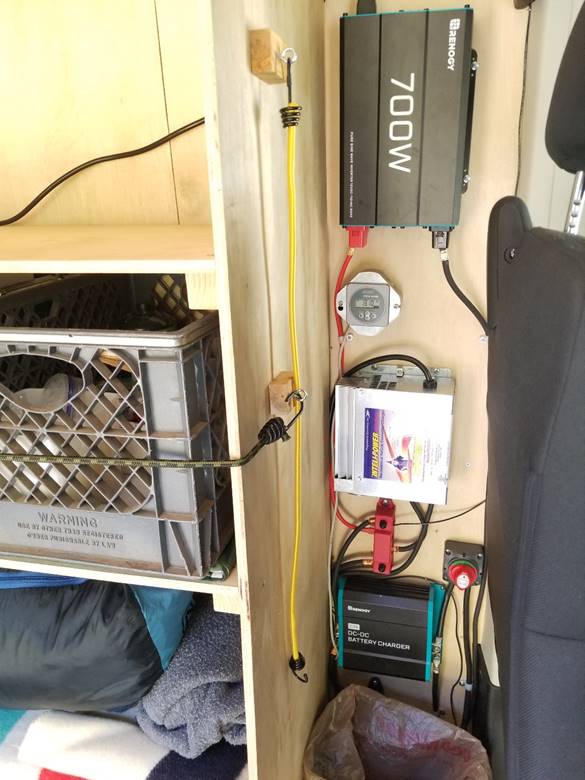
Our electrical needs are minimal. We made a list of everything we wanted to power or charge with an inverter (when we don’t have shore power) and added up the total wattage (watts = amps x volts, or look up the wattage online). We bought a Renogy 700 watt pure sine wave inverter; we don’t need that much wattage, but that was the smallest one they sold.
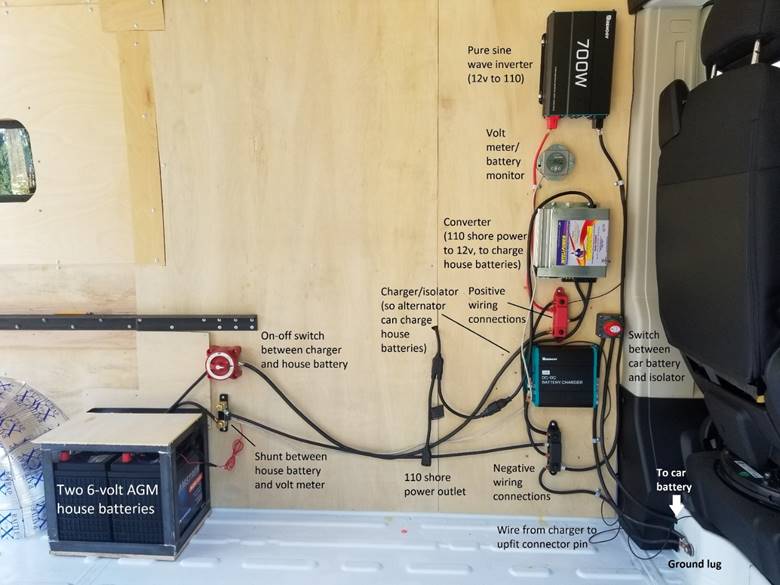
Electrical components. A shelf will sit in the open space. Note that we have since added a 12v connector to power an electric fridge (more info below).
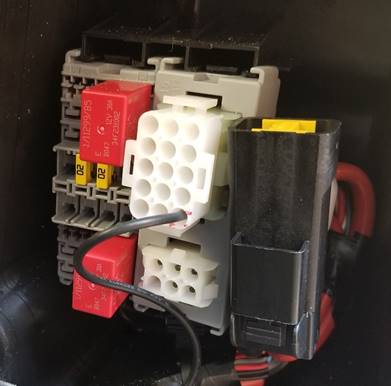
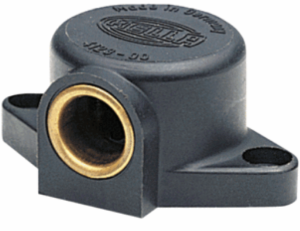
The upfit connector option (only available from the factory), allows us to charge our house batteries from the alternator when the van is running. The connector is located in pillar B, next to the passenger seat. You have to order the white connector plug and pin after market.
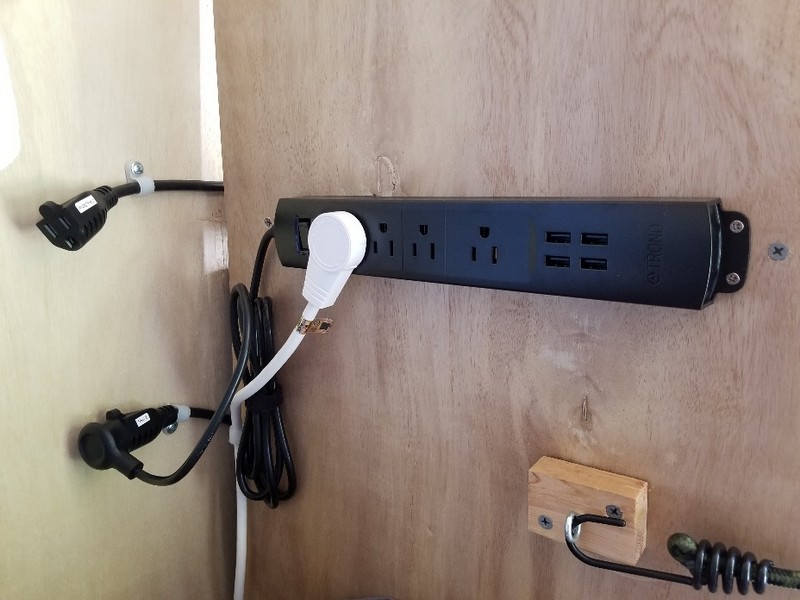
The power strip can be connected to either the inverter or shore power. (A second power strip, for the other side of the bed, is plugged in to this one.)
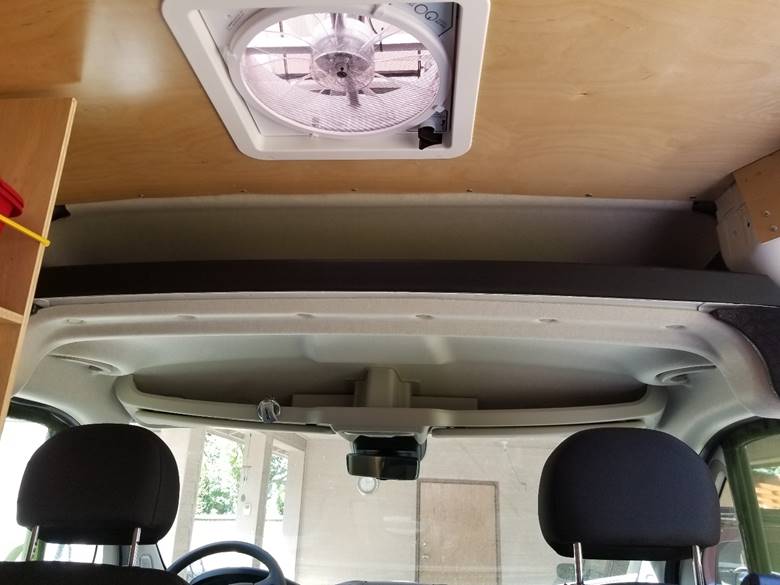
We chose a Maxxfan because it gets great reviews and the cover design allows you to leave it open even when it’s raining. We went with the 4-speed model (non-reversible and no remote). We paid about $500 to have the fan installed. After watching detailed videos on how to do it ourselves, we decided we were too old to be climbing up on the van roof with heavy tools. Also, the installer guarantees it won’t leak.

We installed the fan behind the cab, so it can pull air from the rear windows and create a breeze over the bed. We can also use it as a cooking vent fan.
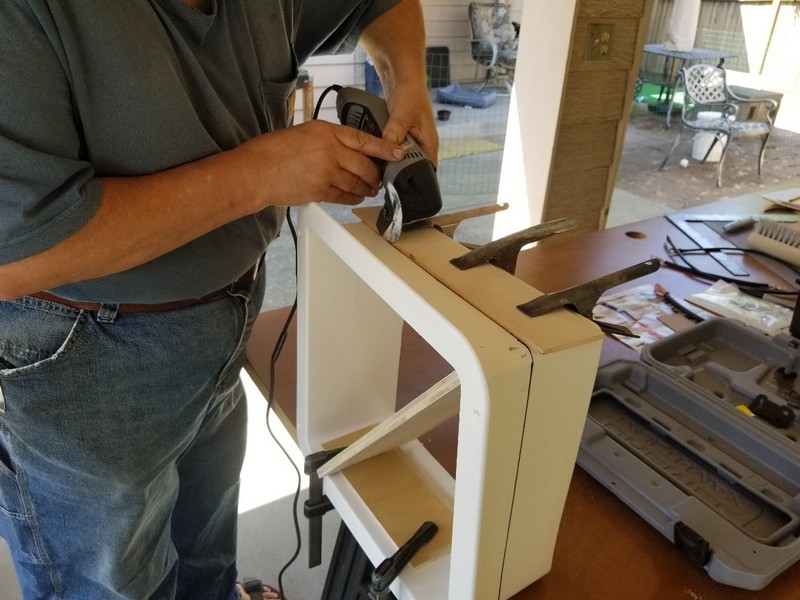
Cutting the fan trim ring to the correct depth using an oscillating multi-tool

Installed trim ring

We noticed quite a bit of road noise, so we purchased this insulated fan cover for $40. It’s well made and really cuts the noise. It easily removes and folds for storage.
Factory windows don’t open, and can’t be replaced with aftermarket windows. If you want RV windows, buy a cargo van with no windows and purchase RV windows. We chose MotionWindows.com in Vancouver, WA, and we’re glad we did. They were professional, skilled, and very nice to work with. Their windows are well made and have built-in screens. We weren’t comfortable cutting big holes in our new van, so we paid them $200 per window to install.

Slider windows with screens from MotionWindows.com
We applied Fatmat Rattletrap to the wheel wells and walls. It reduces road noise by dampening vibrations on the big expanses of sheet metal. They say you only need about 25% coverage, but since we had extra, we used more. A 50-square-foot roll was plenty for the whole van. We did not apply it to the floor or ceiling, because those are ribbed and have minimal vibration. It’s easy to cut and install.
Installing Fatmat sound deadener
There is a ton of information online about the pros and cons of van insulation, and the various types. (We found this site especially helpful.)
We insulated to decrease noise, and to minimize temperature extremes (the van will take longer to warm up in hot weather, and will retain heat better in cold weather). We chose Polyisocyanurate (aka Polyiso) because it is affordable, easy to cut and install, and has a good R-value. It also doesn’t absorb moisture. We used 1” thickness, and insulated the walls and ceiling.
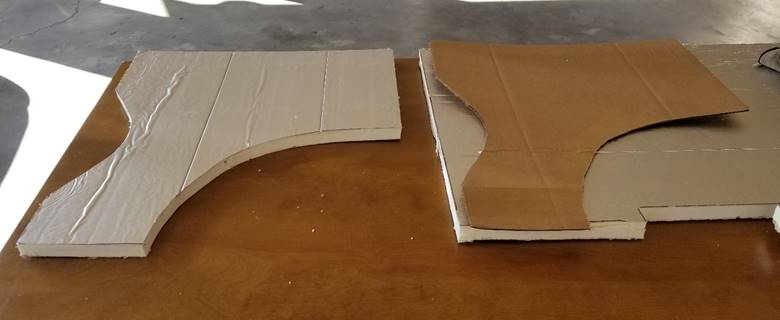
We made templates from cardboard. We allowed a one-inch gap around the edges for spray foam.
Polyiso insulating foam is easy to score and snap (for straight lines). We cut curves with a knife.
Polyiso is light, and easy to prop up with pieces of wood (while you spray on the foam "glue" and allow it to dry).

We used Great Stuff Gaps and Cracks spray foam to seal around the edges. It serves as glue, and prevents moisture from getting between the insulation and the van wall. It’s easy to carve away any excess with a utility or pocket knife.

We used 3 cans of spray foam. We recommend the kind with the reusable applicator.
It’s easy to use and pretty controllable. We recommend wearing old clothes and disposable gloves so you don’t get it on your hands, as it’s super sticky and hard to remove (and impossible to get out of fabric). A small piece of cardboard is handy for catching drips at the end of each run. To store the can for future use, we closed the applicator tip, left a lump of foam on it to dry and help seal the tip, then broke the foam off before the next use. An open can is supposed to keep for up to 4 weeks, but we wouldn’t count on it being reusable for more than a couple of days.
We started to stuff bubble wrap into the small spaces, before realizing that it doesn’t hold up long-term. We did stuff a few pieces of pliable foam packing sheets into some of the rib spaces, but since we don’t travel in cold places, we weren’t too worried about making sure every space was fully insulated.
We used 1/2-inch prefinished birch veneer plywood on the lower walls (sturdier to screw into) and 1/4-inch for the upper walls and ceiling.
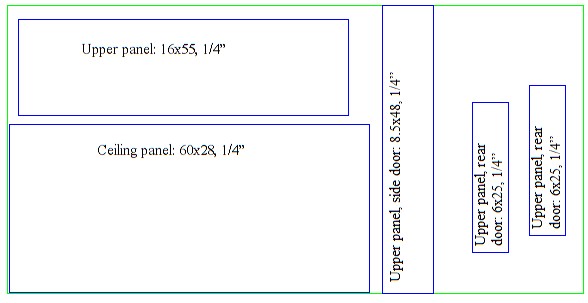
A plywood plan helps minimize wasteage
Before installing any plywood panels, we recommend taking tons of photos and measurements, so you will know what is behind the plywood after it’s installed.
Every panel was a custom shape and size. We measured, measured, and measured again, and made cardboard templates.
We used wood furring strips and shims as needed to compensate for the fact that the van is not square. Luckily, plywood does bend a little.
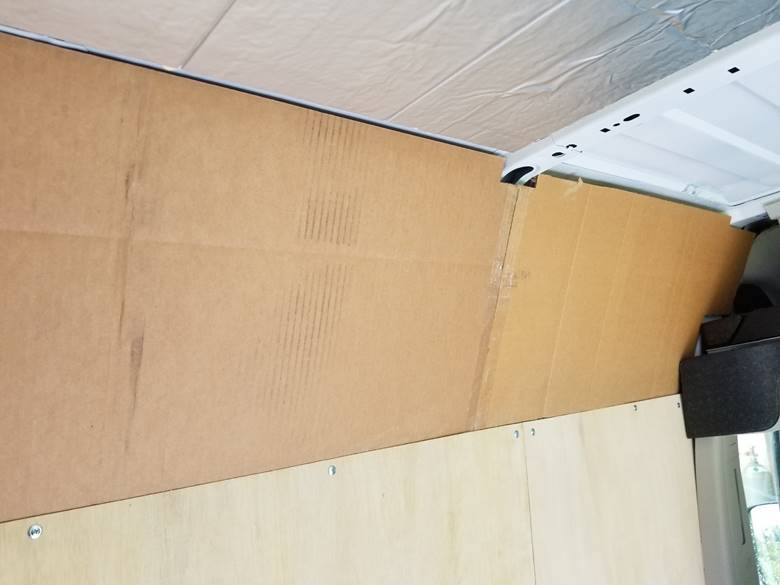
Cardboard template
Installed plywood panels

Shims cut from moulding we had lying around; test the angle to make sure the paneling will lie flat
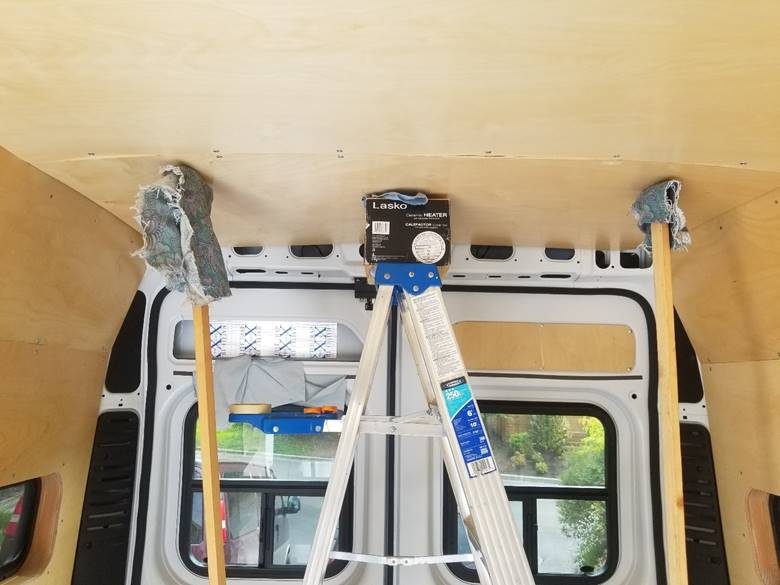
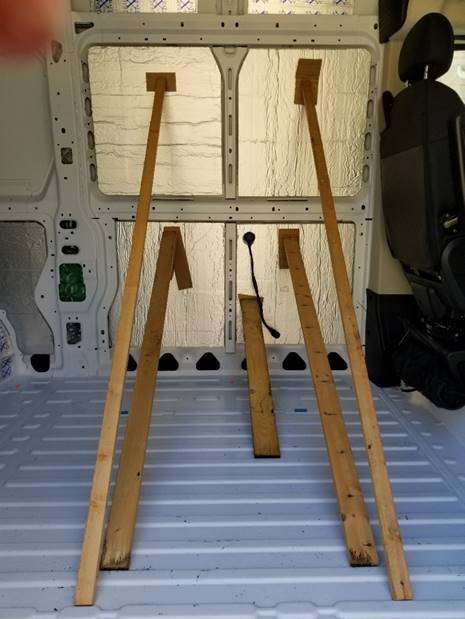
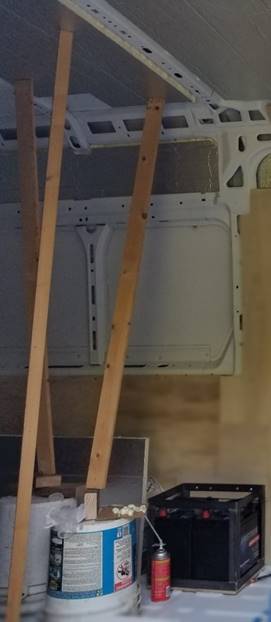
Cobbled together supports hold up the ceiling panels for screwing in


We used small pieces of 1/4” plywood (right) to cover up most of the holes (left); it was tricky due to the odd shapes and bumps
There is a 3-inch gap between the van wall and the plywood around the side windows. You can’t screw window frames into the van wall. Thanks to Urban Explorer for this great window frame solution.
We cut curves out of 2x4s and screwed them together with 2x2s to create a frame that fit snugly around the window:
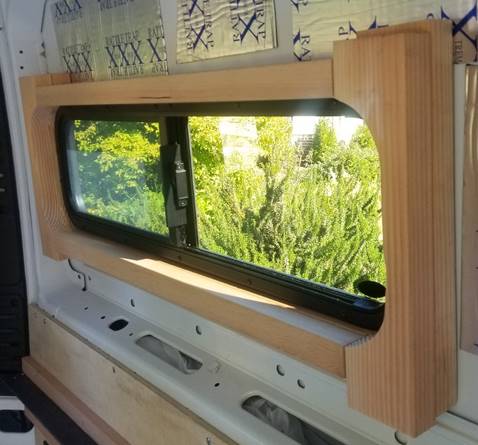
Window frame
We carefully measured four places to screw to the frame corners, placed the plywood over the frame (the frame and window were now hidden, thus the measurements), and screwed the plywood to the frame with wood screws (pre-drill the holes in the plywood).
Then we removed the plywood (with the frame now attached) and traced around the inside of the frame to mark the hole to cut.

Frame attached to back of plywood
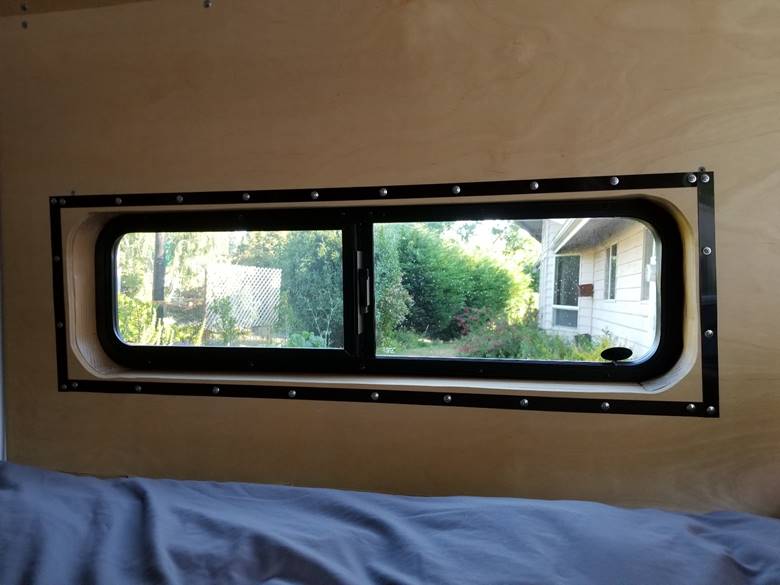
We cut the hole with a jigsaw, added more screws into the window frame, then screwed the plywood to the van ribs.

Finished window frame
We wanted a permanent north-south (fore-and-aft) bed so we don’t have to make up the bed each night, and one of us doesn’t have to climb over the other to get in or out.
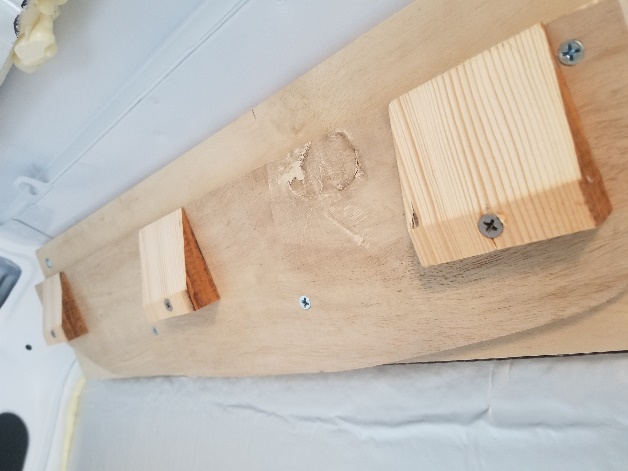
We screwed a 3/4-inch-thick oak furring strip to the 1/2-inch paneling with wood screws, then used structural screws to attach 2x2x3/16 metal angle (because that's the size we had on hand).

The long top rail holds the bed, and the shorter rail underneath is for a shelf
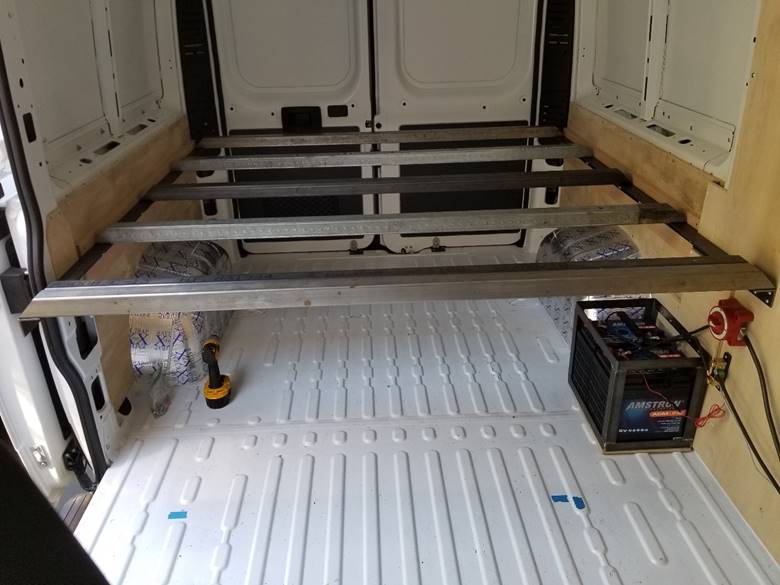
For the crosspieces (slats) we used 2x2 square steel tube (we wanted to use 1x1.5 to save weight, but it would have cost $300, and we already had the 2x2 stock). We did not want any supports under the bed itself, so the slats had to be strong. Note that the ends are cut at an angle for access to the bolt. We used two slats on the front edge for extra strength if two people are sitting on the end of the bed. We coated the metal with Flood Penetrol to minimize rusting.

Short bolts hold the slats to the rails, and one long bolt through each piece of plywood prevents the plywood from sliding around
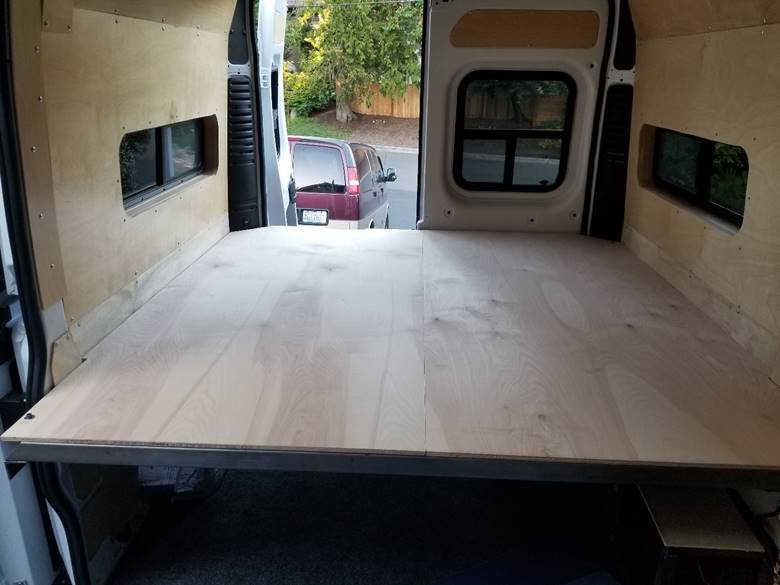
Two pieces of 1/2” plywood cover the slats; each piece is bolted to a slat in one place so it can’t slide fore or aft

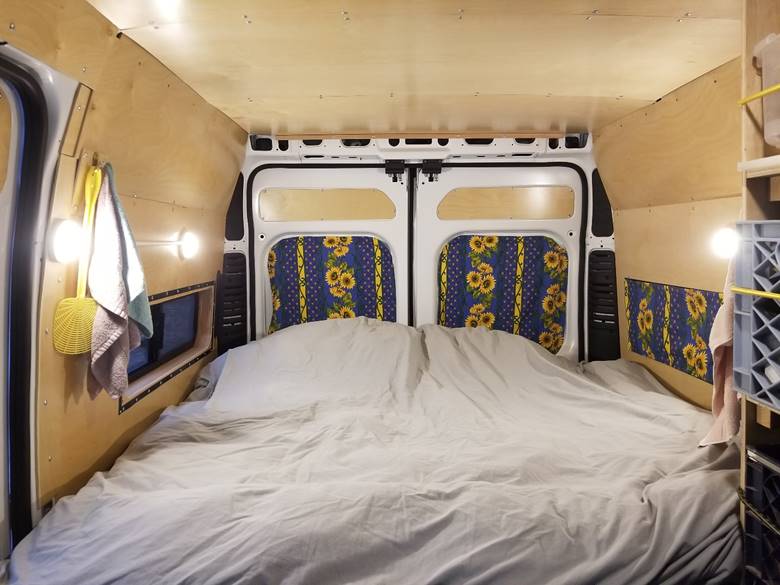
Queen size bed with storage space on each side

Storage bins on each side of the bed
Under-bed shelf for storing bulky flat things

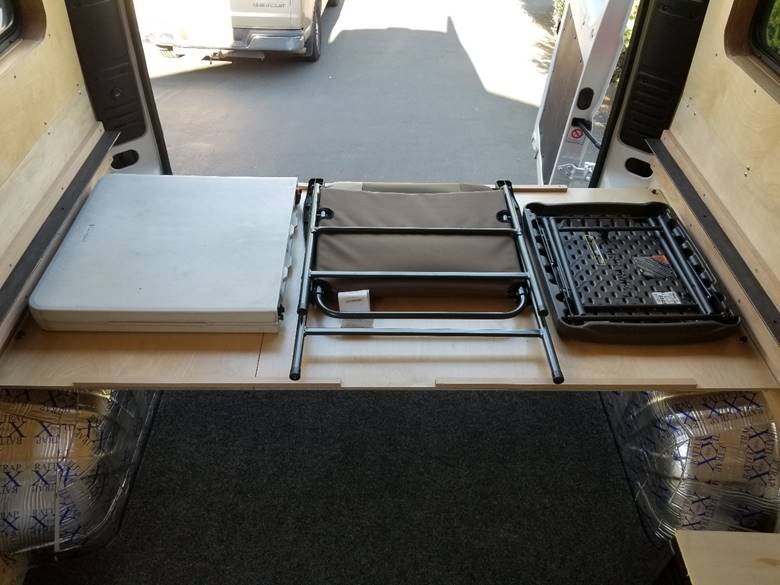
There is plenty of space under the shelf for tools, water, EZ-Up canopy, chair, propane fire pit, propane, etc.

Clothes and shoes are accessible from inside the van. The heavy-duty blue bins come with dividers. The homemade sheet metal shelves are bolted to the bed frame.

Storage shelf made from 1/2” plywood, screwed to the wall in four places with L brackets. Bungee cords keep items in place while driving.
Bungee cords clip to eye hooks, and hang out of the way when not needed
Some people call the storage cubby above the cab "the pizza oven." We use it for trekking poles, hats, daypacks, and more. (It's part of the RV Prep package.)
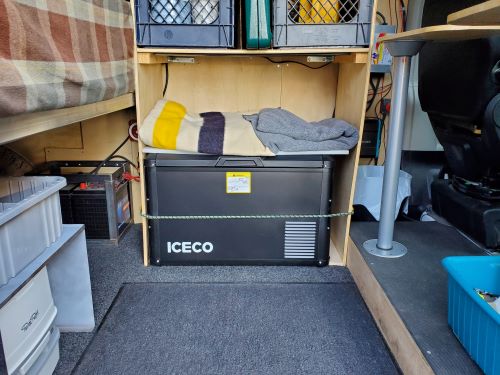
Thanks to advice from Gnomad Home, we chose an IceCo VL60ProS Single Zone Portable Fridge Freezer. It has a low battery power setting that will turn the fridge off if the house batteries get below a specified level. We can use ice if needed.
To plug in the fridge, we wired a 12V socket to the 12V bus. We chose a "merit" (hella) socket, which has more rugged construction and higher current carrying capability than a standard cigarette lighter socket.
After doing a lot of research into floor options, we went with this cargo mat and we are very happy with it. Our second choice would have been a wood framework with XPS foam squares in the openings, 1/2” plywood on top of that, then vinyl. (Note that it isn’t necessary to glue or screw down the wood or XPS.) There’s lots of good info online about the pros and cons of different types of flooring.

Cargo mat from bedrug.com fits perfectly and is squishy, tough, waterproof, and easy to clean
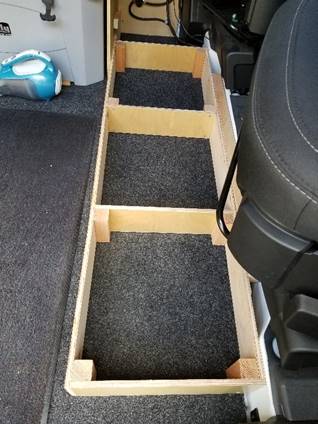
The cab floor is taller than the van floor. When the seats were swiveled, our legs dangled, so we built a footrest. This also provides a place to screw in table leg receivers, and makes it easier to access the above-cab storage cubby.
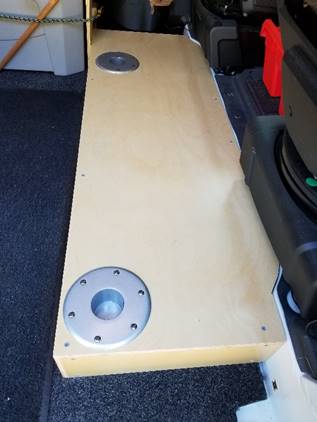
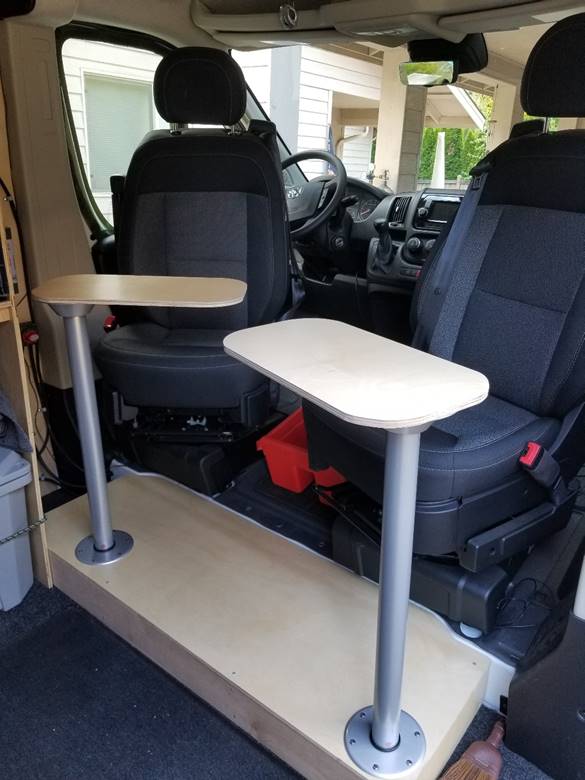
Swiveling table tops are 1/2" plywood. Tops and legs are removable. Purchase the leg hardware here.

The plywood was slippery, so we installed rubber matting cut from an old treadmill. (The brownish stains are dirt.)

When we don't want to cook outside, a large cutting board stored on top of the cooler becomes a stable counter for food prep, cooking, and dish washing. (The bed is perfect counter height.) We crack a window or the fan vent for CO safety. We don’t use this setup for cooking anything that spatters!
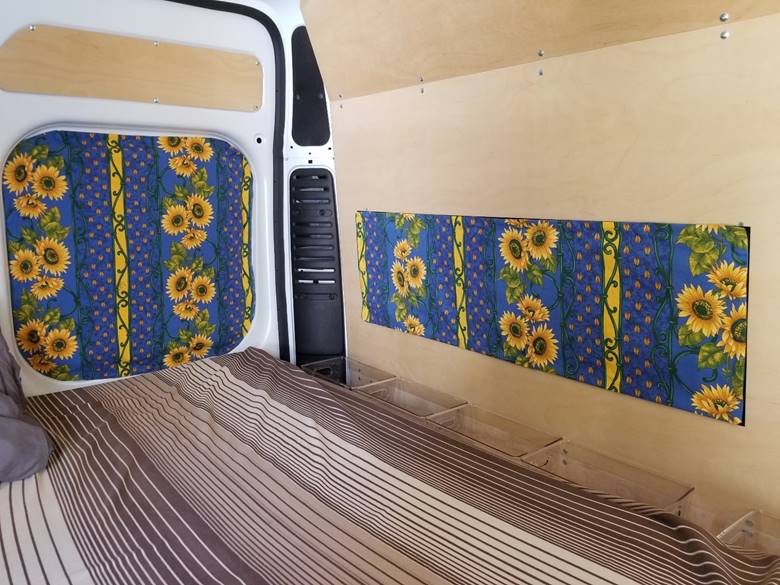
We sewed magnets into the curtains. The two back windows and door window are surrounded by metal; for the two windows surrounded by plywood, we screwed on metal strapping:
Metal pallet strapping scrounged from a dumpster, cleaned, and touchup painted

The curtains fold back if you want them partially open. They’re easy to remove and install.
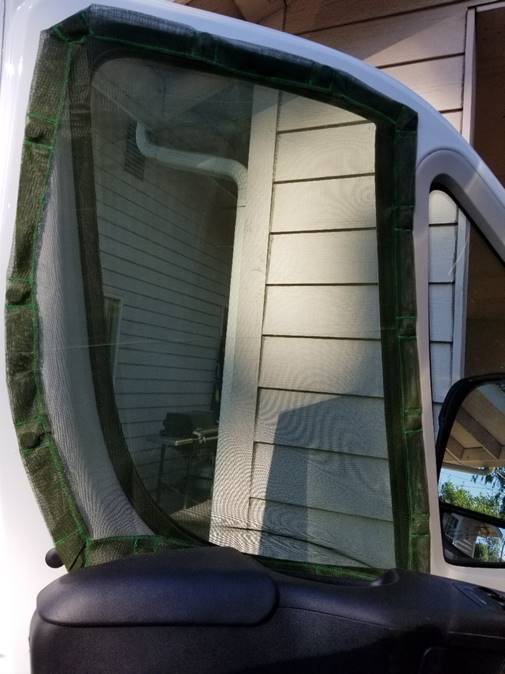
We made mosquito nets that magnet to the inside of the front windows and double as shade cloth on hot days

Custom mosquito doors for vans cost over $300. We bought this one for $29 and slightly modified it (added strong magnets, shortened the bottom, and sewed a small pleat to make it a bit narrower).

This rollup sunshade fits like a glove and is easy to install
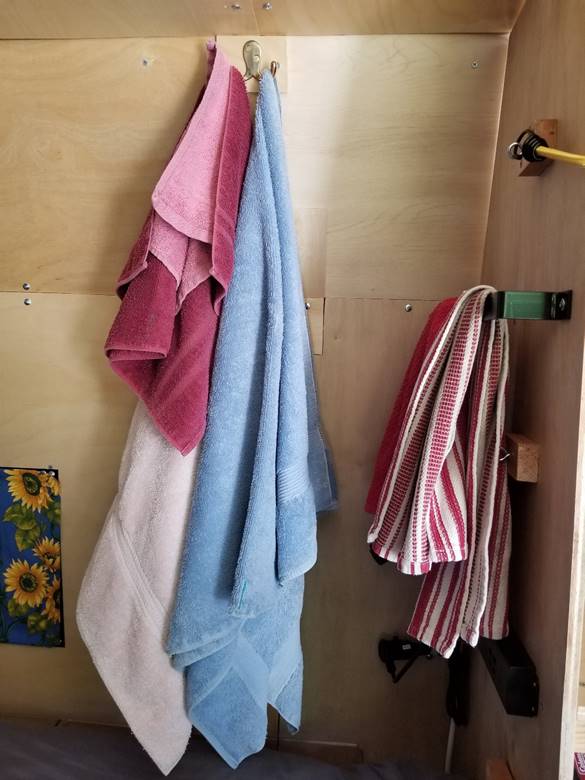
Towel hooks, and a towel rack made from flat bar
We installed four push-button 12-volt puck lights: one overhead, one we can reach from the door opening, and one on each side of the bed. We highly recommend using 3M butt connectors and these "T" connectors. Neither requires any wire stripping.
Save all cardboard and wood scraps -- we used them!
Measure, measure, measure! Nothing is square or symmetrical.
Before cutting any paneling, buy new saw blades and several rolls of masking tape.
The build took four months at an average of 2-3 person hours per day.
The costs above do not include:

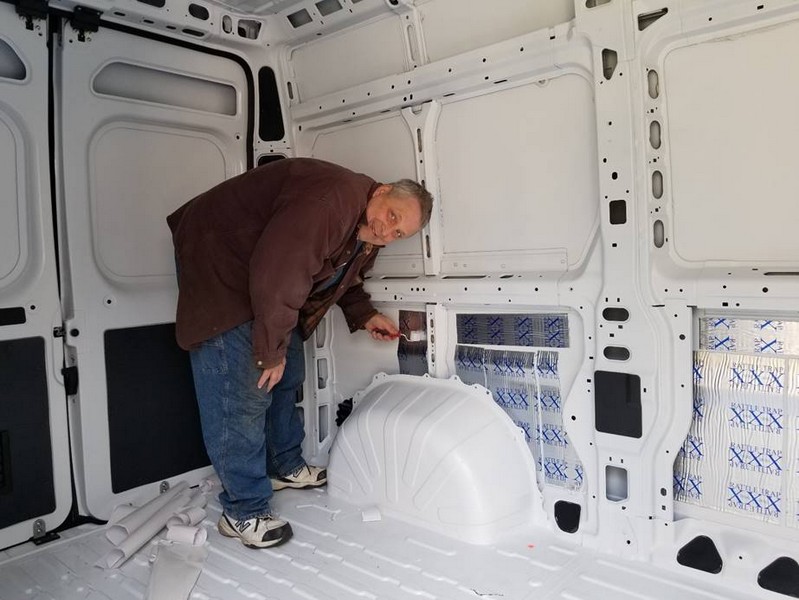
Karen cutting foam for insulation