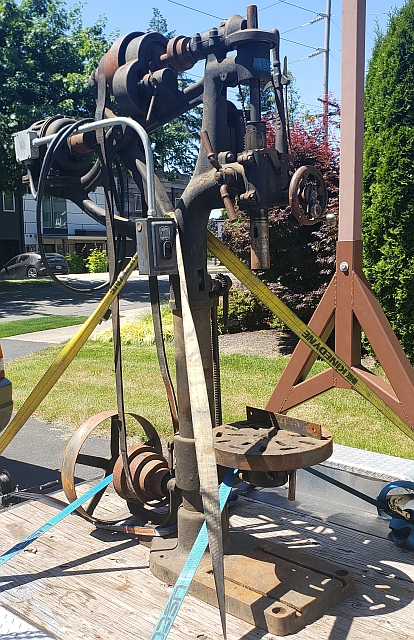
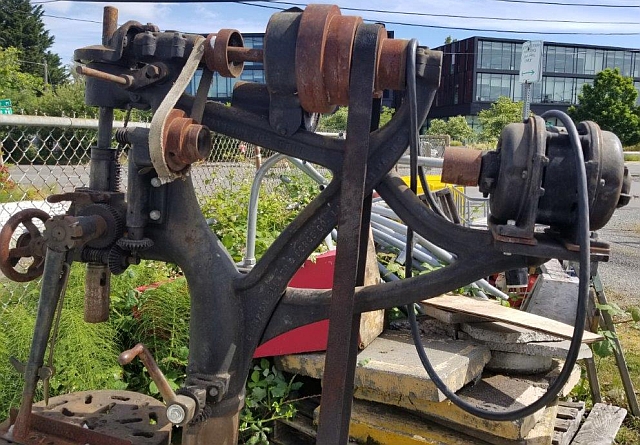
I grew up in Seattle. A few years ago I got a call from an old friend who also grew up in Seattle. He is a long term volunteer at a place called the Center For Wooden Boats on north Lake Union. He explained to me that the managers of an old building in Seattle had a very old drill press which they never used and in fact had donated it to the Center For Wooden Boats. That organization contemplated using the machine again but eventually decided against it. In the meantime it had sat outside in their yard and had rusted quite a bit. My friend, as I mentioned, called me and basically asked me to come take it away out of their yard. I did that, eventually making basically a small donation to their donut fund.
While I was there he told me the history of the building this machine came out of. If you are interested, here is a link to its history. Way back in the early 1900s Ford used to assemble Model T cars in that building. They stopped in something like 1932 and after that the building was never again used for manufacturing. I think the drill press was purchased new by Ford and left abandoned in that building where it sat untouched from 1932 to 2021 when they got rid of the drill press and it worked its way to me.
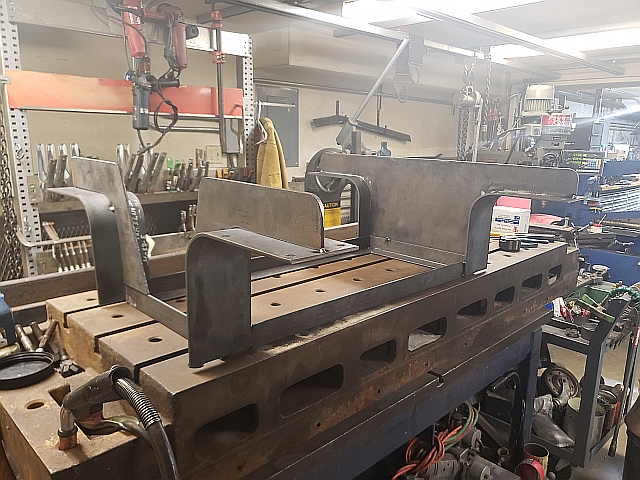
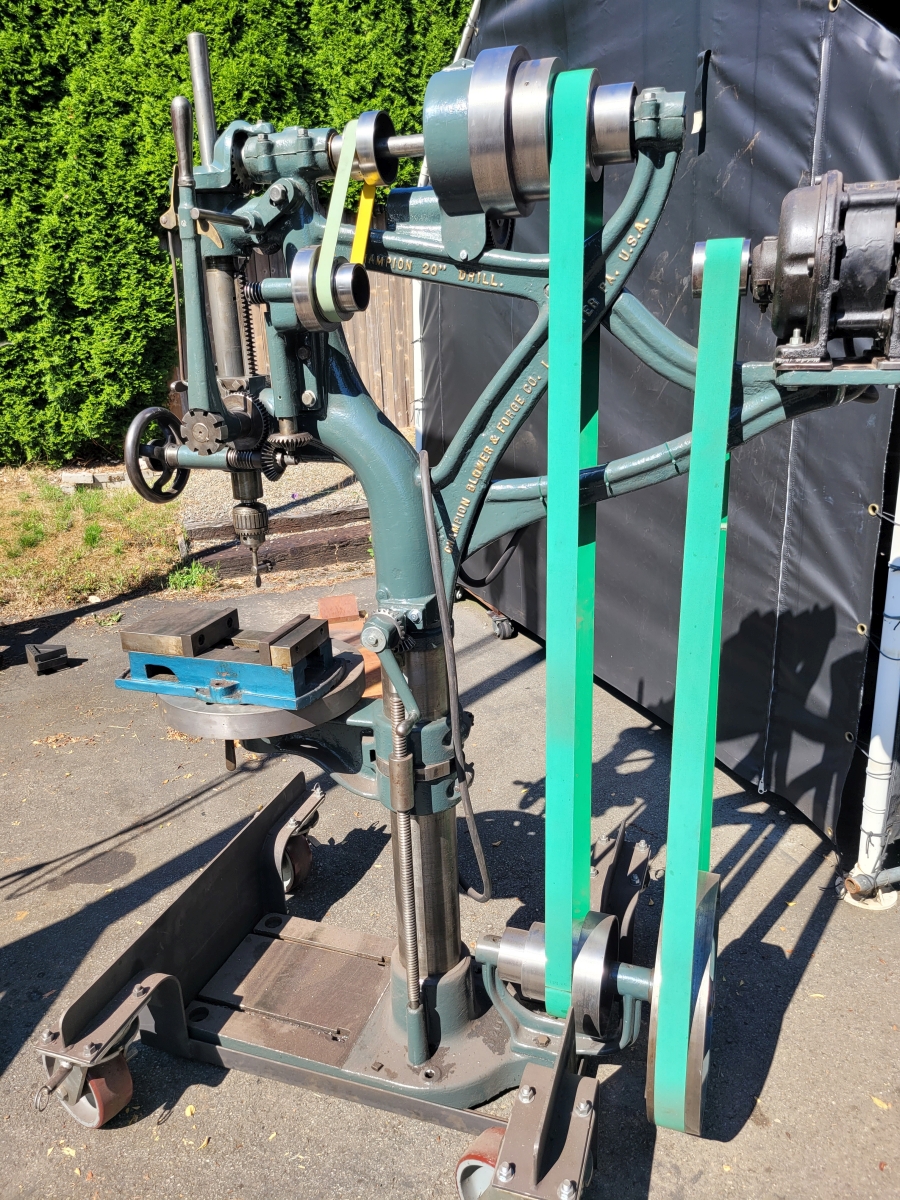
The machine was made by Champion Blower and Forge. It is a 20" drill press of the camelback style. It had a 1 horsepower motor and a 3 Morse taper spindle. It used 2 large flat belts and one smaller one. As I received it, the machine was nowhere near in running condition. The flat belts were still there but were disintegrating from age. The table was badly overdrilled, but the rest of the machine was complete and just needed cleaning and lubricating. This page touches on a few aspects of the restoration job, but is not a complete blow-by-blow project blog. It's a cool old machine, enjoy!
The two pictures at the top of this page show the machine as I got it. I unloaded it off my little flatbed trailer and rolled it under cover. I took off the table and cleaned it and then had it welded professionally. Then my friend Andy with a 17" Howa lathe faced it smooth for me again. Here are before and after shots of the table restoration:
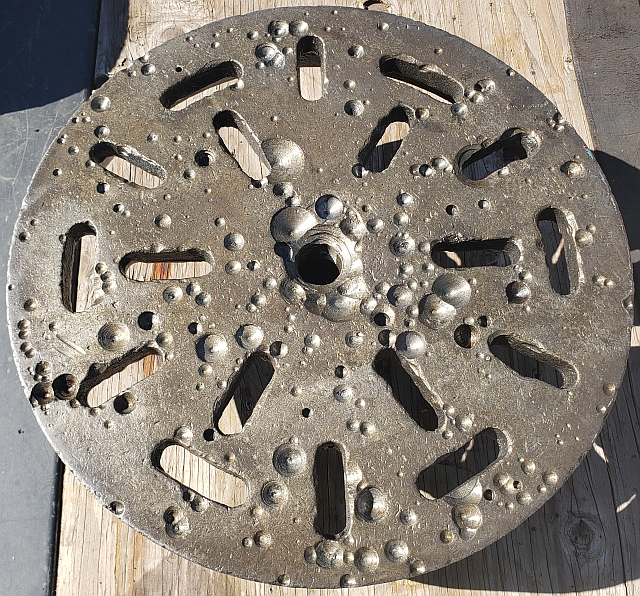
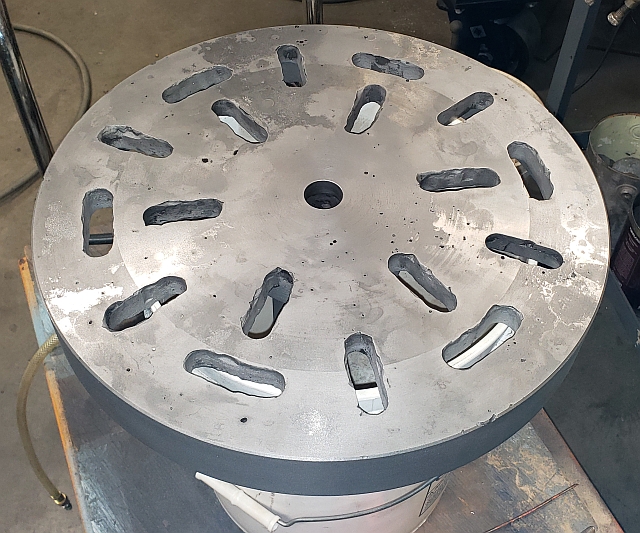
The table didn't come out perfect, but it sure was a whole lot better than it had been! After that I built a rolling cart for the drill press which allowed me to move the machine much more easily. Here is a picture of the rolling base on the welding table during fabrication:
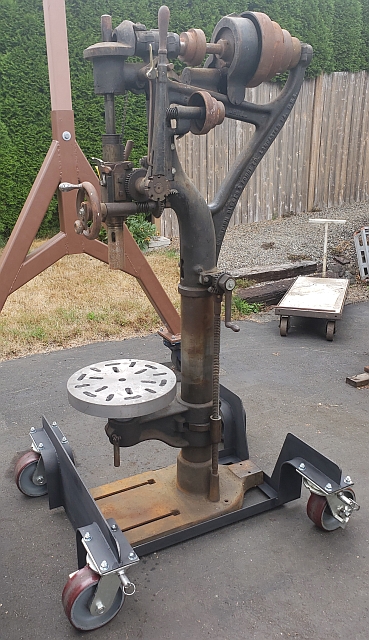
Notice that the machine sits much lower in the rolling base than the tops of the casters. Without that lowering the drill press would not fit under my shop door!
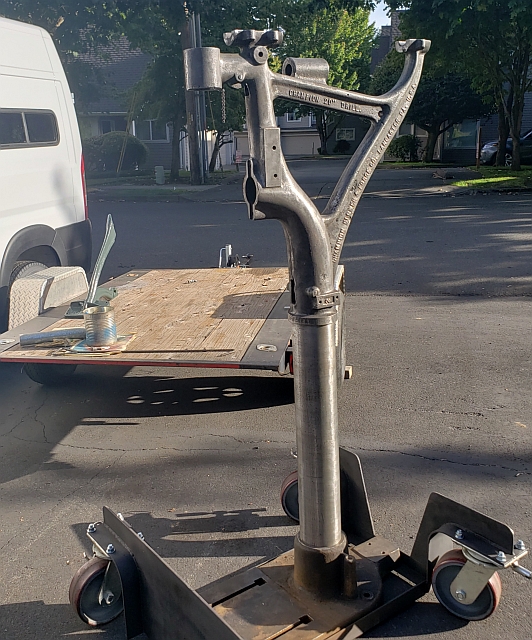
Now that I could move the machine around, I took everything off of it so I could work on the frame and base. This is what it looked like after one day spent cleaning:
Just a note on the color I chose: one of the old Ford colors from the Model A era was called "Rock Moss Green". I had seen it in pictures and liked it and figured out the numbers so my Benjamin Moore paint dealer could make me a gallon. I figured an old Ford drill press should have an old Ford color.
Then came a long cycle of cleaning, derusting, polishing and painting. These machines are quite modular so I can easily work on one subassembly at a time. I should say that it turned out the babbitt bearings in this machine were still good which was a relief as melting out and pouring new babbitt would have been quite challenging.
After the bulk of the restoration grunt work was done, I turned to the problem of finding new belts. Flat leather belts used to be used all over in industry. Every sizable town had a leather belt place. In Seattle it was called Peet Belting. Sadly, in 2021 all of these places were gone. I contacted some online vendors and inquired as to flat belt prices. I was astonished to find out that a new set of leather belts would have cost me over $600! Anyway, to make a long story short I wound up buying green fabric belts made by Habasit, a Swiss company. I learned a lot while measuring the belts and fitting them into place. The biggest lesson is if you want to restore a flat belt machine that doesn't have belts watch out because they can be very expensive to replace.
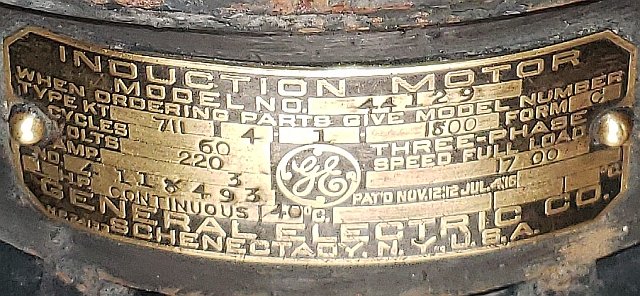
I used the motor pretty much as is. It is old enough so it was not painted. Rather, it had a japanned finish. The hard black coat was still intact nearly 100 years later. Here is the nameplate from the motor after cleaning:
The motor did not have a junction box to contain the wiring. I was able to buy a new motor wiring box online, and, astonishingly, it fit the hole pattern in the motor. So I tucked the motor wiring in there. I added a drum switch to the machine and ran cable around the frame secured with green wire ties I bought on Amazon.
So that's a quick overview of doing the restoration. This is what the machine looked like when I was done:
It's a lot of work to restore one of these camelback drill presses, and it's not a money-making proposition. I sold it a couple of years after I finished the job and I probably got back 3/4 of the money I put into it during the restoration. I wouldn't have done it if I didn't truly enjoy the work. A lot of people walked into my shop and when they saw the Champion they were blown away by how cool it looked. It was a fully functioning machine tool again in its new home. For me, I'm on to the next (and last!) camelback restoration. But that's a story for another day.
Thanks for reading!
Thanks for reading!