I signed up for a Richard King scraping class and wanted to work on a project that was different and also challenging. I recently saw a forum posting in which Denis Foster mentioned he had a new design for a box square. Finished, it is 12 x 30 x 4" and weighs under 50 pounds. Since Denis Foster is somewhat local to me (he's in Bellingham, Washington and I'm a couple of hours south in Kirkland) I decided to order one. This article is about how the raw casting (already heat treated) was machined.
I didn't know how this part should be machined. It seemed to me to be a job for a big horizontal mill, one with at least 32" of table travel. I asked around my metalworking club and didn't find a horizontal mill within 100 miles so I prevailed upon my friend Bryan to do the job on his Haas VF-5SS vertical machining center (VMC). Bryan did a wonderful job of thinking through the setup and writing the code to do the actual machining.
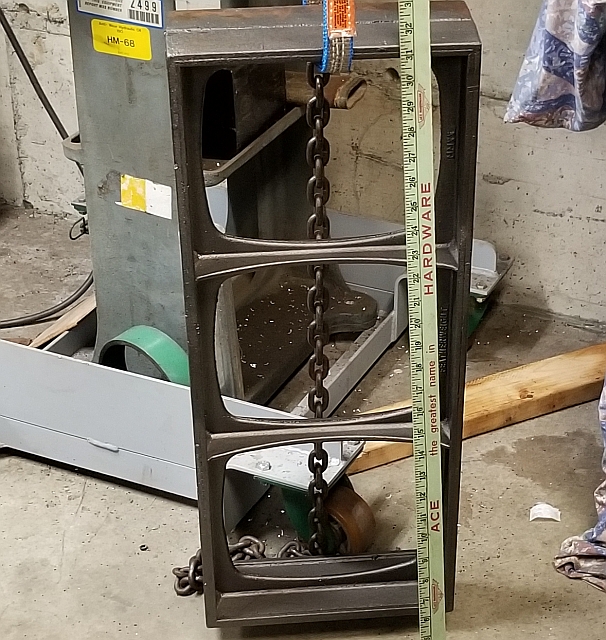
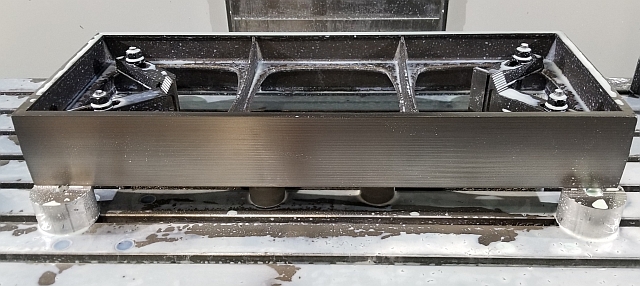
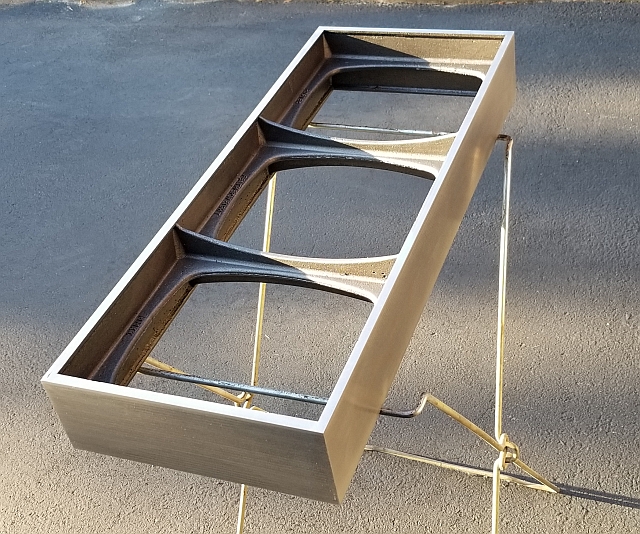
Above is a photo of the raw casting I received. If you look closely, you can see that there is a rectangular outer frame of cast iron. On the large 4x30" side facing the viewer in that photo, you can see that this outer frame has a substantial amount of thickness, perhaps 5/8". Our general plan was to clamp the part down and face off the front of the rectangular frame, then flip the part over and clamp it solidly on the machined surface and then do all the rest of the machining in one setup. With a new VMC and a single setup, the part should be quite square and the sides quite vertical and parallel.
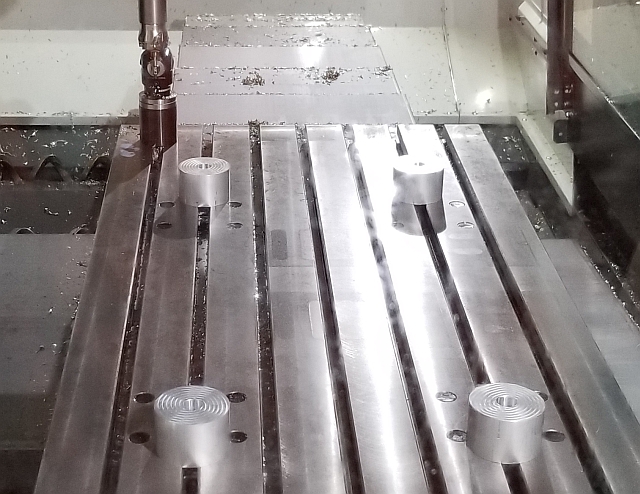
Bryan made 4 aluminum "pucks" which are solidly bolted to the table. In this next picture, we have fitted the pucks to the table and are about to mill them all to the same height.
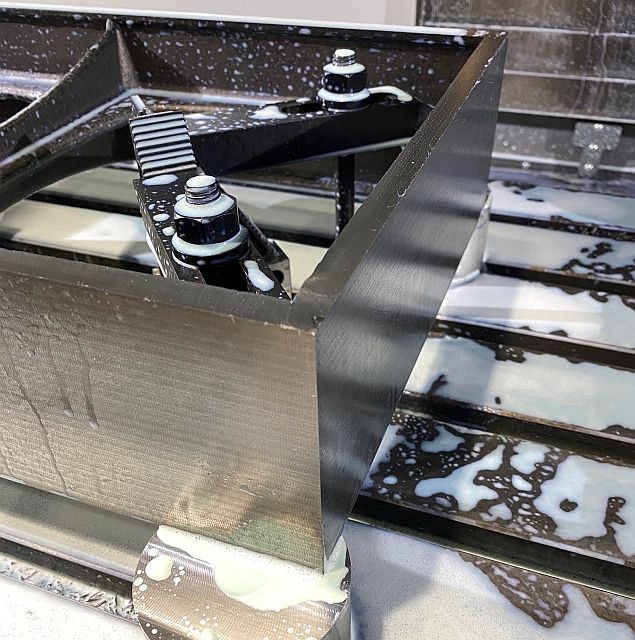
These sacrifial feet measured exactly the same after machining. When I set the casting on the 4 pucks, though, it did not sit solidly. Even though the casting looked flat it actually wasn't. We removed one of the feet and replaced it with a machinist's jack. We carefully extended the height of the jack until all 4 corners were solidly supported, then clamped the part down and began facing off the outer frame. Here is the setup with the jack visible under the lower left corner:

I am no videographer, but I did shoot a few seconds of the facing operation on the second side (with the part solidly bolted to all 4 feet). This video is 29 Mbytes so it should't take too long to load on a fast connection.
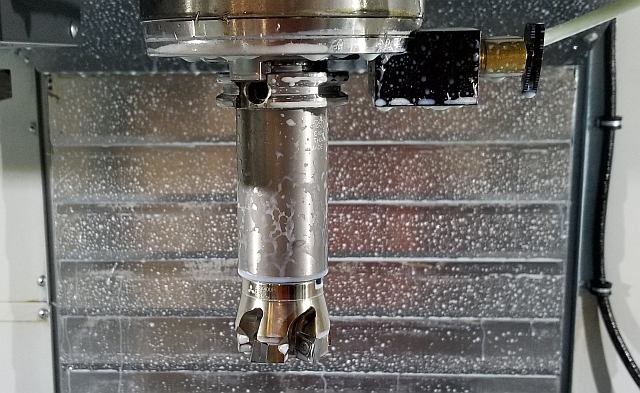
A word about the mill tooling: Bryan used a face mill with 5 Mitutoyo inserts on a long arbor. This worked well for both facing and side milling. The arbor did flex just slightly, but a final finishing cut removed all imperfections. Here is a shot of the tool and arbor:
I did shoot a video of one pass of the final finishing cut on a long side. Warning: this video is 185 Mbytes so if you click on it, it will take awhile to load.
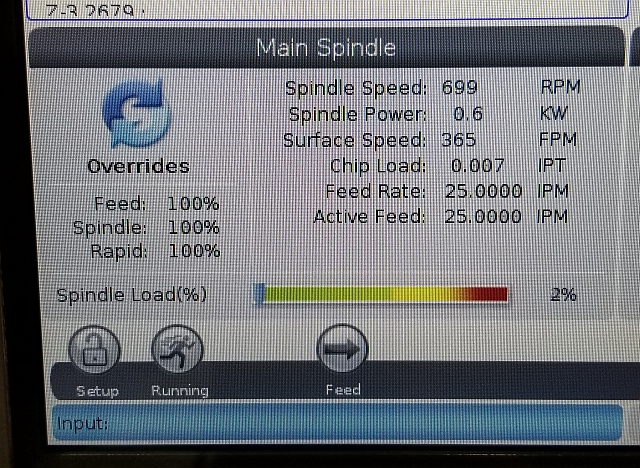
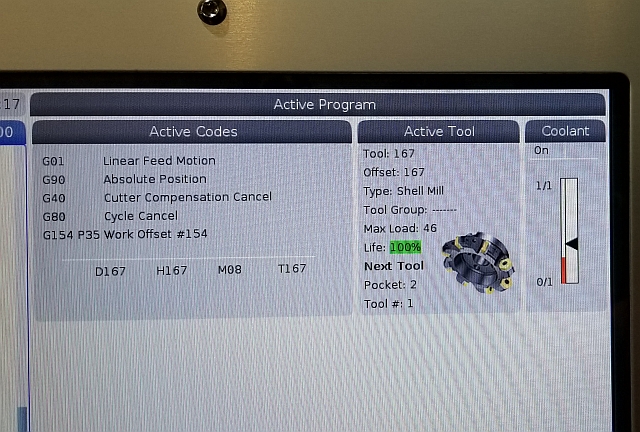
I know some of you will be wondering about the spindle parameters and also the general milling parameters including feed and speed. Here are two screen shots:
The next picture shows the project at the end of the first day machining:
Here are shots after the two sides were milled:
We finished machining the box square last night. Here is a shot of the finishing pass on the back (4x30") side:

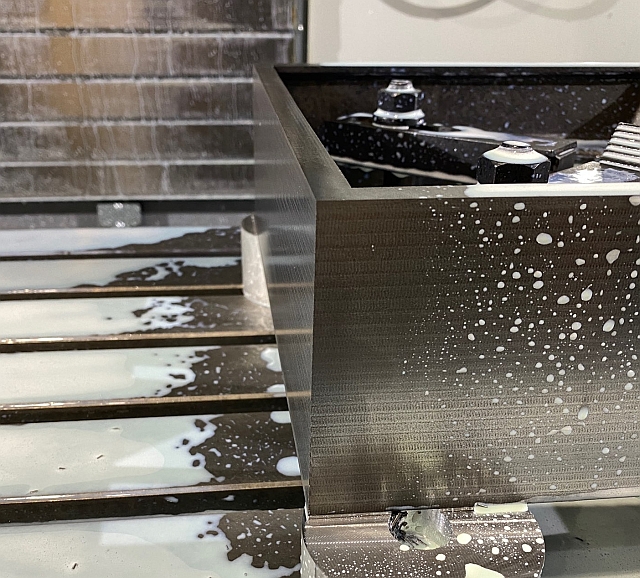
We also took a final facing pass over the narrow top edge to clean up the last remnants of imperfections from the (super high quality) casting. Refer to the second picture up where a small void is perceptible on top of the right corner. Here is that same corner after the final facing:

This has been a very interesting learning experience. It was my first experience with a sophisticated modern vertical machining center. I'm just a home shop guy. When I was a kid I loved junkyards. We used to go there a lot to keep our old beater cars running. Later, I spent 13 years in Seattle's shipyards. Nothing at all like this project. To see a gleaming perfect shape emerge over the many hours of machining, especially from such an amazing machine, well, it was a very memorable and pleasant experience.
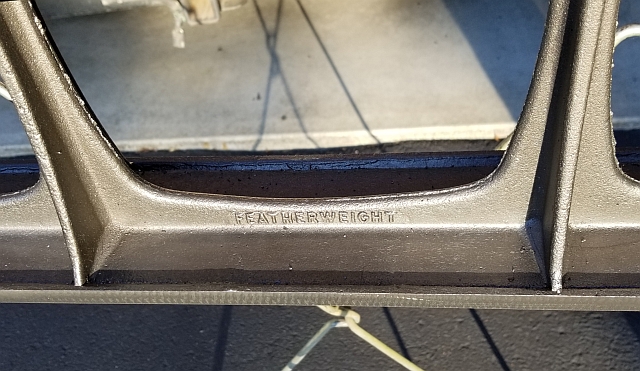
I have to thank Denis Foster who provided me with the featherweight box square. Denis only sells by word of mouth through ebay, where his user name is fotodoc. He designs his tools for a high stiffness to mass ratio. He makes his own patterns and casts his own iron. He is a great guy, easy to work with, friendly and knowledgeable and he stands behind his products. Denis posts to PM under the handle dgfoster.
I also have to give a huge shout out to my friend Bryan who has the most amazing home shop I've been in. He patiently sat through the many hours of machining over several days. Bryan is a member of my local metalworking club and is one of its many outstanding individuals. He is a former captain of industry and he now does R&D on products to help the environment and at the same time benefit indigent people in Africa. If you are curious, see this link. Here is a picture of Bryan in front of his awesome Haas VF-5SS vertical machining center:

This part wouldn't be complete without a picture of the fully machined part:
Now that the machining is finished, it's time for a lot of handwork. I will sand the interior parting line to remove the casting flash, and of course all the machined surfaces will be scraped flat, square and parallel.
I may add some text and photos of the part being scraped in class, so check back. Thanks for reading!
metalmagpie