My 12" Sheldon shaper is a nice machine. However, it only came with one crank wrench and it has two sizes of square shaft. The crank wrench kind of fits the 9/16" square shaft but it's way too loose to use on the 1/2" square shafts. So I decided to make one. It's pretty easy to make a handle if you know your way around a welder, but putting a 1/2" square hole down the center of a round bar isn't quite so easy. So I thought I'd write up how I did it.
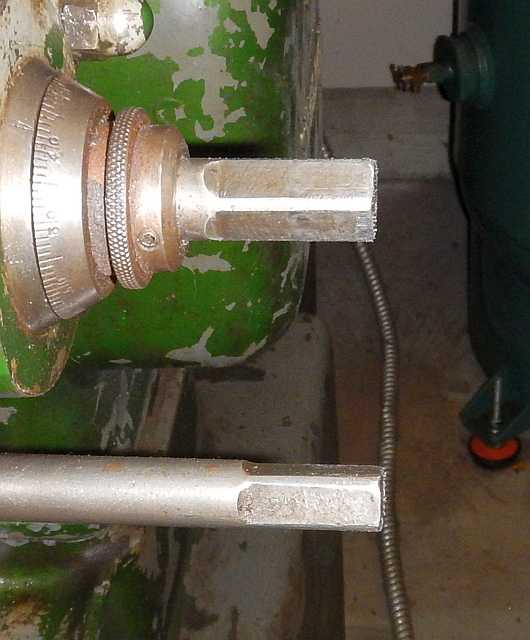
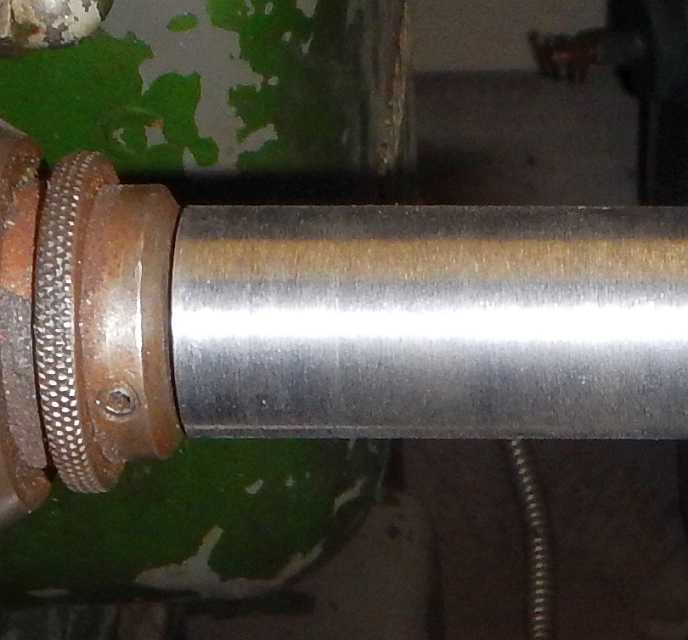
Just to make sure you understand exactly what my shaper's square shafts look like, here's a pic:
Notice that the 1/2" square ends are turned down from 5/8" rod. The round part requires that the square hole in the wrench be counterbored so the wrench can fully seat on the shaft.
So how exactly did I go about putting a square hole down the center of a round shaft? First of all, I know that I can simply buy a square hole sleeve. All the ones I could find, however, were made from leaded steel which is problematic to weld. So I decided to make my own from some 1" bar stock.
I read that a guy named Frank Maclean recommended that you should bore a hole slightly larger than the size of your square hole, then drive a HSS bit in a little ways, then take it out and file away the cut part, then repeat until your hole was done. I tried this method. What happened for me was that my 1/2" HSS bit shattered when I hit it with a hammer. So that way didn't work out for me.
When all else fails you can brute force a solution. I decided to take my round bar, mill away half of its thickness at one end, then to hold that milled face so it was at 45 degrees w.r.t. the end mill, then end mill a 1/2x1/2" vee. Then turn the bar around and do the same thing on the other end. Saw the vee'd out part off of one end and weld it to the other end, and then turn the welds off in a lathe. So that was my general game plan.
One slight complication for me was that at present I don't own a mill. I do have a nice Nardini 1440E lathe, though. Let me digress and tell you a little story..
Some time back at a swap meet I found a sizable milling attachment for a lathe sitting on a guy's table. To my eye it looked about right for a 14" lathe. It also looked like a scaled-up version of the milling attachment that fit my old 9" South Bend lathe. Anyway, I inquired "How much for this?" to which the seller replied "I ain't taking that home." I said "OK, but how much?" and he again replied "I ain't taking that home!" I swallowed and said "How about twenty bucks?" The guy said "Fine." I thought dag nabbit I shoulda offered him ten! Then I hauled it home.
Back home, I did the research and discovered it was indeed a South Bend part. However, it was designed to fit a 13" lathe, and it was nowhere near being able to be mounted on my Nardini's cross-slide. To make a long story short, I designed an adapter and had my buddy mill it on his CNC Bridgeport. I hadn't ever used the milling attachment to make anything, but I figured now was as good a time as any.
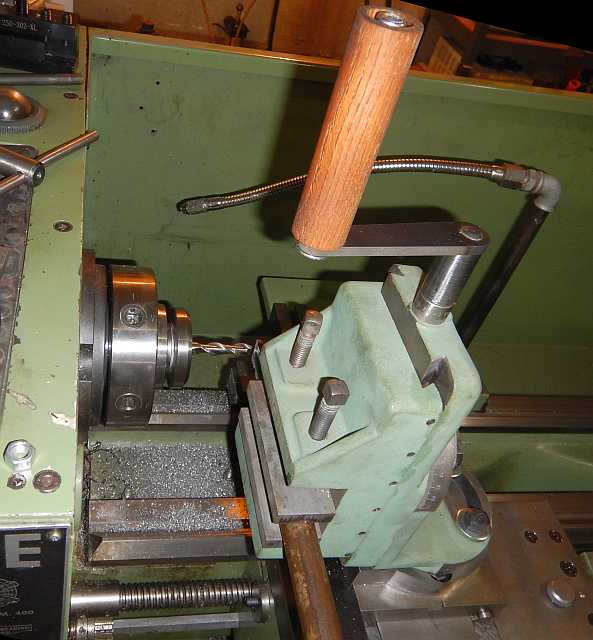
Here's a picture of the milling attachment mounted on my lathe, with a 1" round steel bar held in the vise. These attachments work fine. You can mount an endmill in your spindle and move your workpiece in both the X (across the lathe and back) and Y (vertical) directions. Also, the attachment swivels in two dimensions so you can get your part dialed in. One thing about the SB is that you have to keep the gib screws fairly tight or you get chatter.
Milling half the thickness off of the round bar went pretty well:
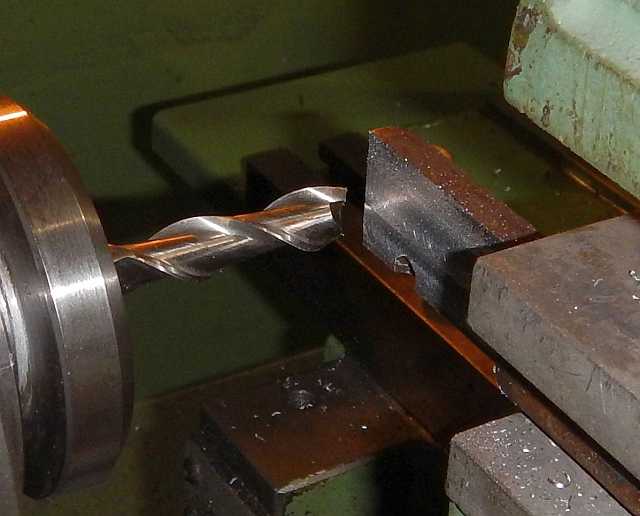
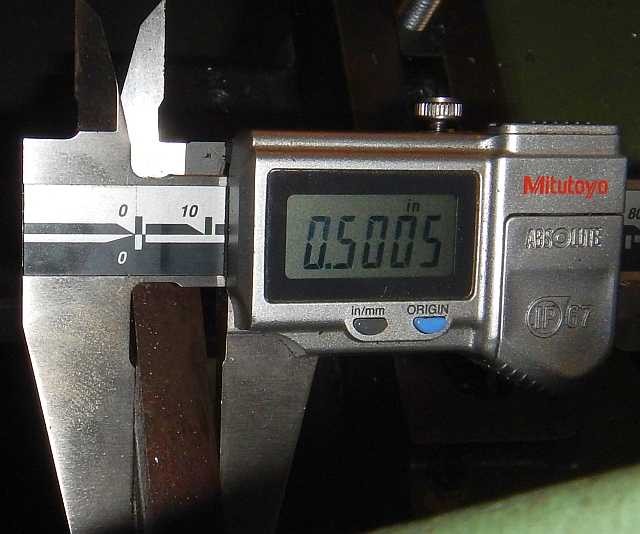
Having started with a 1" bar, I wanted just about exactly half left:
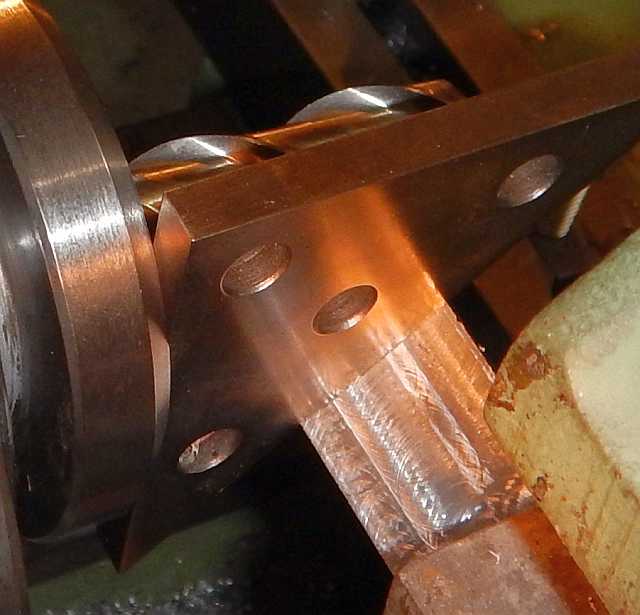
I used a 45 degree gage to help me rotate the bar:
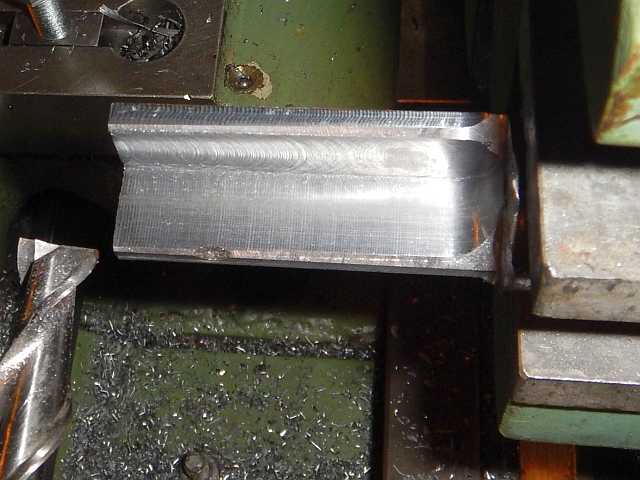
After that milling the vee was also pretty straightforward. Note that I trimmed the edges so when this piece was cut off and fit to the other end, there would be a gap for better weld penetration:
Then I sawed off the outer 2" or so and then milled another identical vee on the far end of the bar. After that I fit the two parts together and did a small amount of hand fitting with a file until everything fit right when clamped. I used a hose clamp to do the clamping while I tacked it, then removed the hose clamp and welded it all up. I just used a MIG welder because I know those welds are soft and machine easily. Here is what the part looked like welded up:

Then I faced it off and turned the outside down to a touch over 15/16":
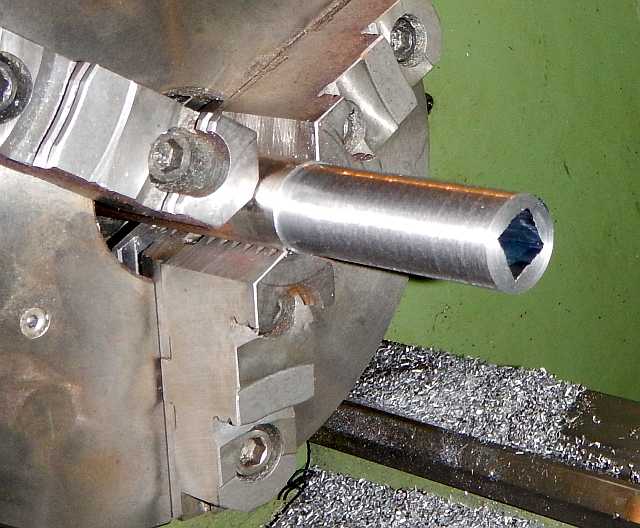
After that I counterbored the end and parted off:

It fits really nicely over the shafts on my shaper:
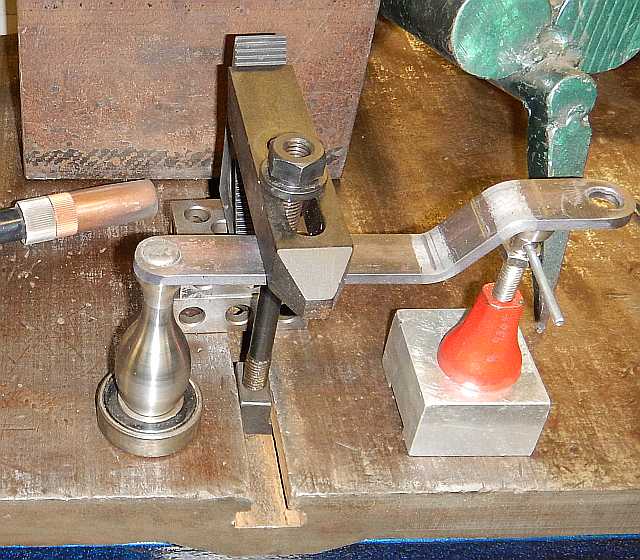
The way I like to make handles is to machine a centering lug on the socket, then fit it through a matching handle made from flat stock. The lug only goes partway through the handle. I clamp them together like this and plug weld. It makes a nice clean joint which is plenty strong enough. You can see the plug weld on the handle I made for the milling attachment if you look closely:
With the socket for the wrench finished, I asked my buddy to turn me a rounded handle on his CNC lathe. I think he did a great job (thanks, Mike!):

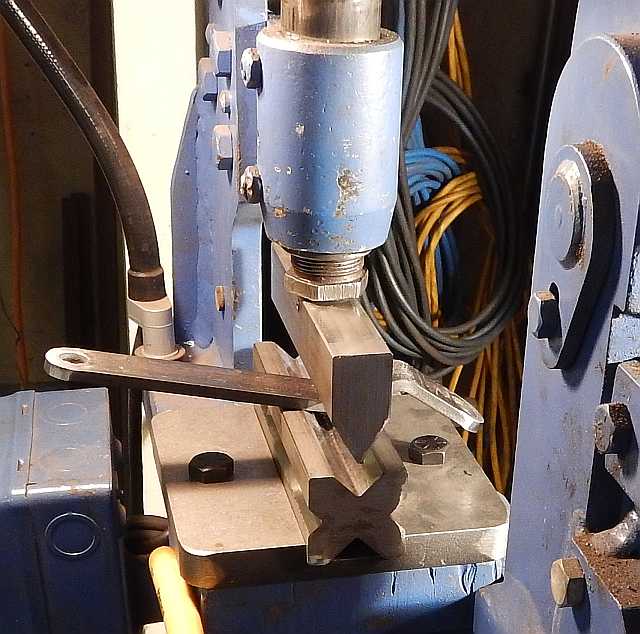
The bar for this crank wrench needs to have a jog in it. The factory crank wrench has a jog in it. So I needed to make a pair of matching bends in my 1/4x1" piece of flat steel stock. I have a small ironworker and it has a small press brake attachment. It isn't much but it's great for jobs like this. In this image you can see I'm partway through forming the second bend:
With the rounded handle, the strap and the socket with square hole all finished, the last thing to do is to plug weld them up. Like many welding jobs, the welding is simple compared to the fitting, or setup. I was able to make use of the tee slot in my welding table to clamp the parts in position solidly.
The handle is made from 304 stainless, but the strap and socket are made from regular steel. To weld the stainless handle to the mild steel strap, I used 308 stainless wire in a spoolgun, along with a tri-mix shielding gas. It welded up fine.
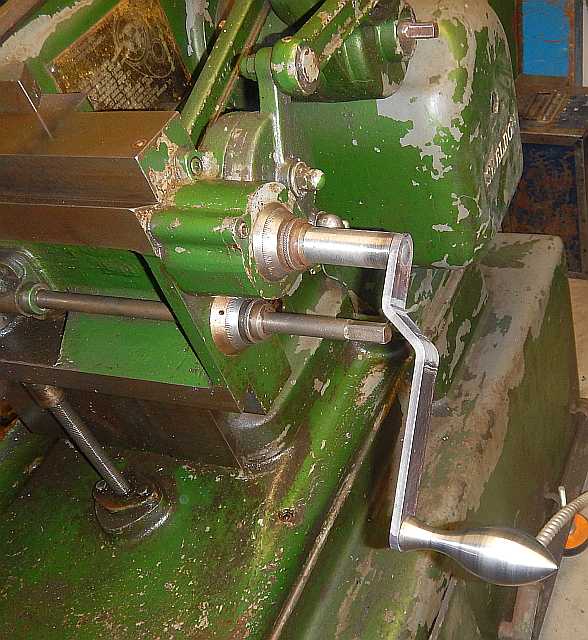
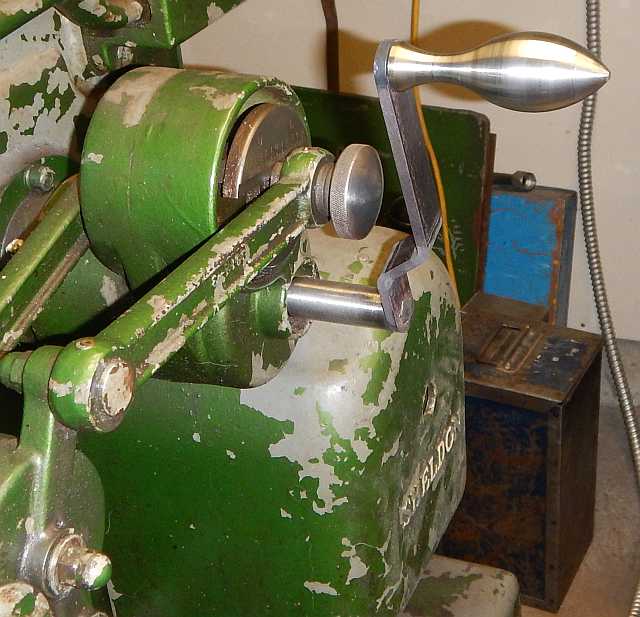
With the crank handle done, I had to see how it looked on the machine! I'll leave you with a couple of shots. In the last picture, you can see why this machine's crank handle needed an offset strap. Thanks for reading!